If you can’t figure out how to put your new brace on, you’re not the only one! We get this question all the time, especially if you purchased the brace from the store and no one showed you how to put it on.
The 537 Shoulder Stabilizer is one of those products. It’s got lots of flaps, straps and Velcro, and it looks confusing straight out of the box.
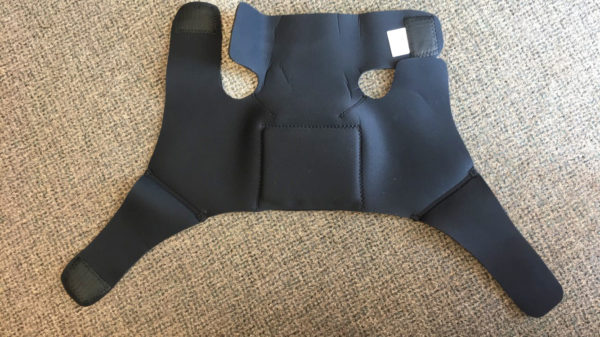
The best place to start is with the support laying flat, with none of the Velcro pieces attached anywhere, inside facing up.
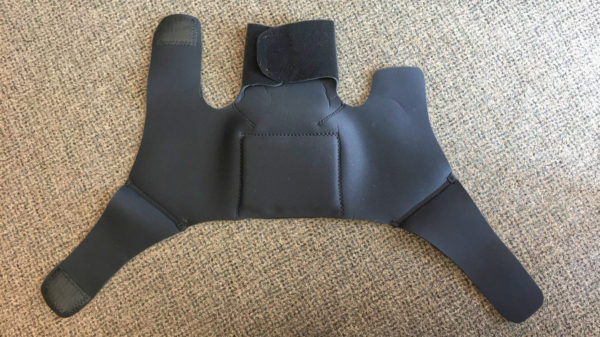
Loosely attach the flap with the white size tag to the flap directly across from it to form a loop. This is the hole your arm goes through.
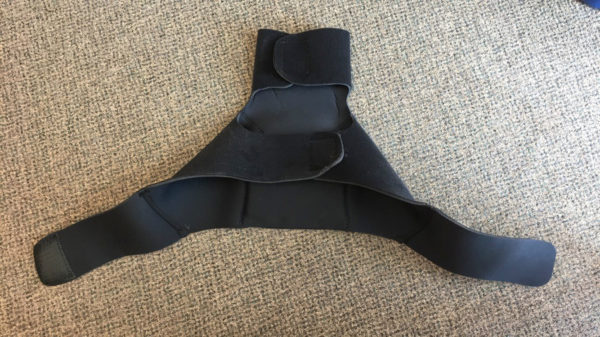
Loosely attach the two flaps below the arm loop. This part goes around your shoulder, attaching under your armpit.
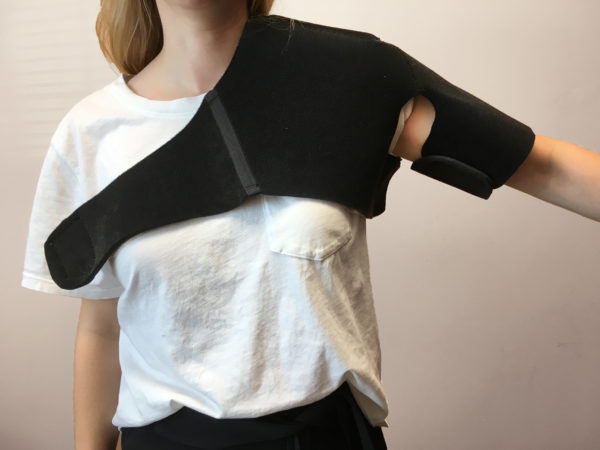
Put your arm through both loops so that the pad is sitting on your shoulder and one flap is hanging across your chest, the other across your back.
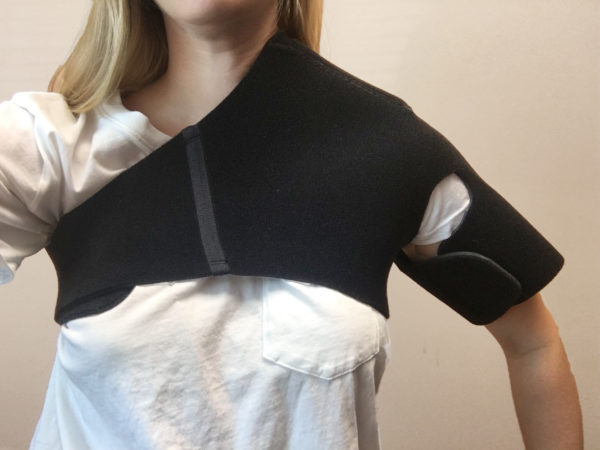
Attach the two loose flaps on the opposite side of your body, under your other arm.
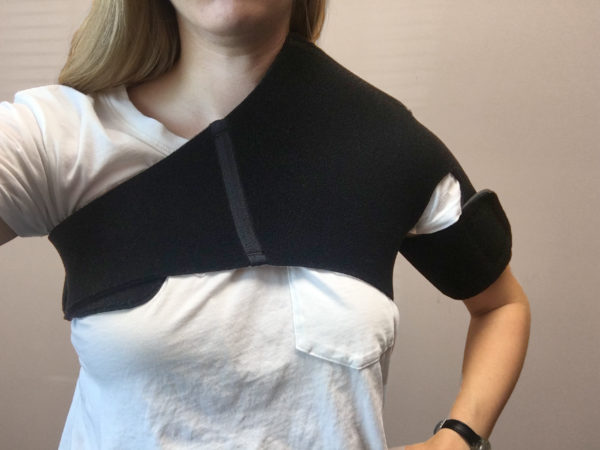
Adjust all the Velcro attachments as needed so that the brace is snug.
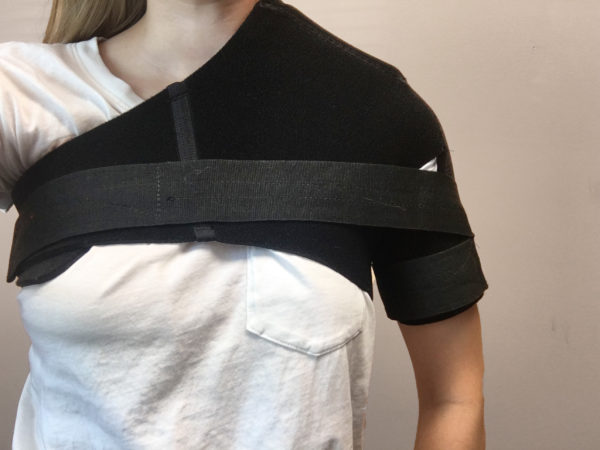
If necessary, the separate Velcro strap can attach on the arm the brace is applied to, wrap around the arm, and attach across the front or back of the brace, limiting forward or backward motion.
And that’s it! If you have any questions about how to put any of our braces on properly, don’t hesitate to call or email us.
